Nikon makes two categories of lenses for DSLRs - FX format and DX format.
The lens format is tied to the sensor format in the camera body. The FX sensor is full-frame, meaning the sensor itself is physically the same size as a frame of 35mm film (36mm wide x 23.9mm high). The FX sensor is built into the D3, D3X, and D700. The DX sensor is smaller in size (23.6mm wide x 15.8mm high), and comes in the smaller DSLR's: D300, D90, D80, D70, D60, D40.
The image coming through the lens must fit precisely onto the sensor, so that what you see in the viewfinder directly translates to what you see in the photo. Thus, the FX lenses are designed to project a larger image onto the larger FX sensor, while the DX lenses project a smaller image onto the smaller DX sensor. The glass is different so that the image you see in the viewfinder is configured larger or smaller when it hits the camera body. Probably the easiest way to tell an FX lens from a DX lens (aside from the fact it's labeled on the lens) is to turn the lens around and look at the rear element of the lens; the FX has larger glass in the rear, while the DX has smaller glass in the rear.
Nikon does offer flexibility, however. If you use an FX camera such as the D3, D3X, or D700 you can still use both FX and DX lenses. If you use an FX lens, you get the full-frame image at the full resolution the camera offers. If you use a DX lens, the camera will automatically crop the image to account for the smaller image being projected onto the sensor. You also get a reduction in resolution. This is because the image being projected onto the sensor from the lens, is actually smaller than the sensor itself. Basically the camera adjusts for the fact that the outer edges of the sensor are not receiving any light/image from the lens. Net takeaway - if you have an FX camera, you can use both types, but you lose resolution with a DX. So it makes more sense to use an FX lens.
On the other hand, if you're using one of the DX format cameras listed above, you can also use both FX and DX lenses, but with different results. If you use a DX lens, the image will be normal - normal size and normal resolution. If you use an FX lens, you still get the image you see in your viewfinder, but the focal length of the lens is magnified by 1.5x. So if you set the lens to 100mm, your image is actually 150mm focal distance. You will still get the exact image you see in the viewfinder, because the magnification happens through the lens, and thus through the viewfinder. This actually is a good thing, if you're hoping to extend your range for wildlife or sports. But it can be a bad thing, if you're trying to shoot wide-angle. For example, an 18mm focal length would effectively become 27mm because of the magnification factor. Bottom line - for a DX camera, you can use either format at full resolution. An FX lens helps with longer shots due to the magnification, but can hurt when it comes to wide-angle.
Perhaps the best comparison/explanation I've ever seen is embedded below. Big props to Lilkiwiguy87 for taking the time and trouble to put this together. While I can't necessarily vouch for the musical selection, I must say the video was very helpful as I was researching between the D300 vs. D700, and accompanying lenses.
www.paulsearsphotography.com
Or check out more Paul Sears Photography pages on MySpace, Facebook, or Flickr
Wednesday, May 27, 2009
Thursday, May 14, 2009
Nikon D700 - Totally Unbiased Review
I have finally upgraded to a "real" pro level camera body. The Nikon D700.

So, how's it going so far?
Well, I've been on two multi-day shooting trips, and shot a friend's band at a local gig, with the D700 since I got it. And to be perfectly honest, after a couple thousand clicks, I have to say...I just don't know if there are words to express how I feel about this camera.
I mean, I could use the word LOVE, but it would be a ridiculous understatement. Maybe if I wrote LOVE in a giant font it might come close. This camera is fantastic. Beyond fantastic. I've never been happier.
OK, I better leave it at that, just in case the Mrs. reads this. At least for now, the D700 still sleeps on the couch.
When I was shopping, I was considering the D300, which runs about $1500-$2000 for the body. However, once I started looking closer at the D700, the choice became clear. The D700 is a little more, priced at about $2500-$3000. I pulled out the ol' haggling tactics and actually got mine for less, at Samy's Camera here in Culver City, CA.
Yes it's more, but what you get for that increase is well worth the price:
- 12.1 Mgpx FX Full-Frame CMOS sensor (same sensor as the D3)
- EXPEED 14-bit RAW processing (same processor as the D3)
- ISO up to 25,600 (same as the D3)
- 3" 920,000 dot VGA color monitor (same as the D3)
- 51-point AF matrix (same as the D3)
- Active D-Lighting, Sensor Cleaning, 5+fps (same as the D3)
Do I sound like a broken record yet? Intentionally so....this camera is basically 80% (or more) of the D3 for like 50% of the price. And in some areas, it actually outperforms the D3.
Let me break it down this way. Here are a few reasons why I'm head over heels in love:
 |  |
 |  |
 |  |
Monday, March 2, 2009
Nikkor 70-300mm VR AF-S f/4.5-5.6G IF-ED
Yes, I know, that's a lot of acronyms. And I'll admit I've typed them all out any number of times since this past Friday, when I picked up this awesome new lens. Well worth the price, it replaces/upgrades my 55-200mm less which was part of the kit when I first bought my D80. Let me say again, this lens is awesome!
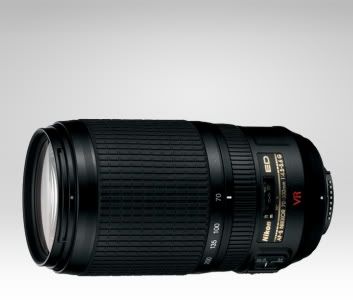
First of all, it reaches 300mm (compared to 200mm I had before). Second, it's an FX-format lens, so it will work with the D700 camera body I'm planning to purchase soon. Third, it's so much more robust than the 55-200 lens - not just bigger/heavier, but better quality optics and better VR (Vibration Reduction). And of course, because I'm still shooting with a D80 (which is DX format), I actually get a magnification factor of 1.5x. Meaning its max reach is effectively 450mm.
But that's not all. Until now, for long shots like ball games or wildlife, I was shooting 200mm with a 2x teleconverter (aka the poor man's telephoto). But the downside of the teleconverter outweighed the extra reach. 1) You lose 2 stops worth of light. 2) You can't use AF, so you're trying to eyeball precise focus on something a hundred yards away. I can't even count the number of images I've discarded due to softness around the edges, because I was off by less than 1-degree on the manual focus ring.
Alas! No more! My reach is effectively increased, with no loss of light, better optics, and the ability to use AF. Baseball Spring Training here I come!
And last but not least, for the acronym nerds among us, here's the breakdown:
- 70-300mm = Focal Range of the Lens
- VR = Vibration Reduction
- AF-S = Autofocus w/ Silent Wave Motor
- f/4.5-5.6 = The Lens' Maximum Aperture (Variable)
- G = Aperture Settings Controlled Internally
- IF = Internal Focusing
- ED = Extra Low Dispersion Glass
For more on what any of this gobbledygook actually MEANS, read more here.
www.paulsearsphotography.com
Or check out more Paul Sears Photography pages on MySpace, Facebook, or Flickr
Sunday, February 22, 2009
Nikon D700
I think I've finally settled on my 12MP upgrade. The Nikon D700.
Either a full-frame version of the D300, or a more portable version of the D3 - both are accurate statements about this camera. Performace-wise it's within inches of the $5,000+ Nikon D3, for about half the price. It also takes pretty much everything that's good about the more affordable D300 and takes it up a notch. At $2,499-$2,999 depending on where you buy, this is a full-featured pro-level 12MP camera at a good price. More to come!
www.paulsearsphotography.com
Or check out more Paul Sears Photography pages on MySpace, Facebook, or Flickr
Wednesday, February 18, 2009
Balboa Park, San Diego, CA

A few months ago a pro photographer friend of mine recommended Balboa Park in San Diego as a great place for a shooting trip. Recently I had the opportunity to take him up on it. Admittedly I was there in the off-season, but nonetheless it was a fantastic place to spend a day walking, shooting, and relaxing. Not to mention the San Diego Zoo is right there as well. If you're in the area and have the chance, it's well worth the time to check it out.
www.paulsearsphotography.com
Or check out more Paul Sears Photography pages on MySpace, Facebook, or Flickr
Sunday, February 1, 2009
New Greeting Card Multi-Packs!
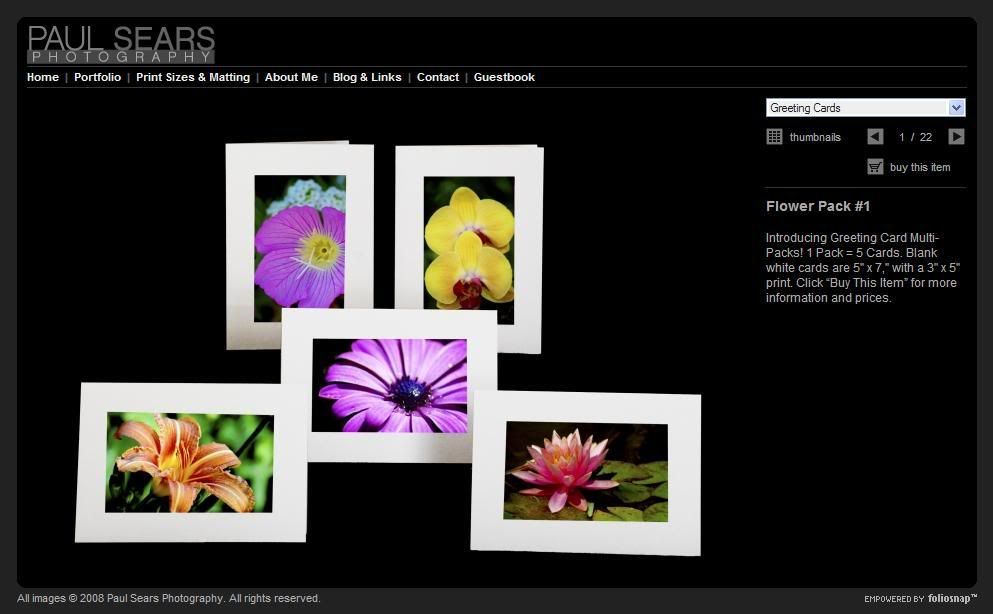
Introducing new greeting card multi-packs on Paul Sears Photography. In addition to single cards, Paul Sears Photography now offers greeting cards in packs of 5. There are currently 9 multi-packs available, with more coming soon.
www.paulsearsphotography.com
Or check out more Paul Sears Photography pages on MySpace, Facebook, or Flickr
Sunday, January 11, 2009
Nikon D90
I came across an article recently in PDN about Nikon's new D90.

For quite awhile, I've been looking at the D300 as an upgrade to a 12.3 MP body. But now the D90 could be a contender. Price of course is a major difference between the two. The D300 is a pro camera, while the D90 is a consumer model at about half the price.
However one major difference (as you may have seen in the Ashton Kutcher TV spot) the D90 is the first DSLR camera to shoot 720p HD Video. Video in a DSLR...interesting. Could be a lot of fun at ball games. Certainly something to think about...
Similarities
- Both the D300 and the D90 have a 12.3MP CMOS sensor.
- Both the D300 and the D90 have a 3" 920,000px color screen.
- Both feature Nikon's noise reduction up to ISO 3,200.
- Both have Nikon's D-Lighting image enhancement feature.
- Both have built-in sensor cleaning.
Differences
- The D300 is considered a pro-level camera ($1,799 MSRP).
- The D90 is a consumer model ($999 MSRP).
- The D300 has a 51-point AF system.
- The D90 uses an 11-point AF matrix.
- The D300 shoots 6 frames per second.
- The D90 shoots 4.5fps.
- The D300 is a still-photo camera only.
- The D90 is a still camera but also shoots video.
www.paulsearsphotography.com
Or check out more Paul Sears Photography pages on MySpace, Facebook, or Flickr
Monday, January 5, 2009
Shooting in Early Morning
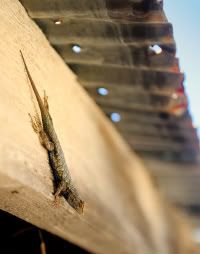
This past Sunday (when the sun finally came out again in LA), I woke up early and headed up the coast about an hour to La Piedra Beach just north of Malibu. I've been wanting to try and catch the early morning light up there for a while. It was well worth leaving the house around 6:30am. The long light just after sunrise was perfect, providing warm highlights and fantastic directional lighting on the rock formations and wildlife.
The photo gurus always say, if you're going to use natural light, then shoot just after sunrise or just before sunset. They're right. Compared to shooting mid-day when the light is harsh and overwhelming, the subtle angled light of early morning is wonderful. On the three shots below, notice how the directional lighting provides dramatic contrast and warm highlights.


www.paulsearsphotography.com
Or check out more Paul Sears Photography pages on MySpace, Facebook, or Flickr
The photo gurus always say, if you're going to use natural light, then shoot just after sunrise or just before sunset. They're right. Compared to shooting mid-day when the light is harsh and overwhelming, the subtle angled light of early morning is wonderful. On the three shots below, notice how the directional lighting provides dramatic contrast and warm highlights.
www.paulsearsphotography.com
Or check out more Paul Sears Photography pages on MySpace, Facebook, or Flickr
Tuesday, December 2, 2008
Nikon D3
Well, since it's Christmas time, I thought why not do a post about my dream camera. The Nikon D3:
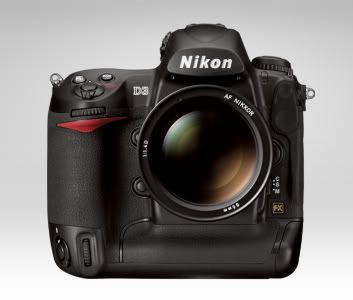
Where to begin? 12.1 Megapixels - check. Low noise even at 25,000 ISO - check. Full Frame 35mm Size CMOS Sensor - check. 9 frames per second - check. Cnet Editor's Choice Award - check. American Photo, Camera of the Year - check.
Downside? Other than the pricetag ($5k) I'm struggling to find one.
Santa - are you reading this?
www.paulsearsphotography.com
Or check out more Paul Sears Photography pages on MySpace, Facebook, or Flickr
Monday, November 24, 2008
Using a Polarizing Filter
Ever take a photo on a bright sunny day, only to have the sky wash out and be pale bluish-white? Ever wonder how photographers manage to get that perfect blue sky?

One of the best ways to get the most out of the sky is to use a Polarizing Filter. A Polarizing Filter, or Polarizer, is a filter used to control the contrast and lightness of the sky, reduce glare and atmospheric haze, and increase color saturation. Here's a great example from the Wikipedia article on filters - the image on the right uses a Polarizer, while the image on the left does not:
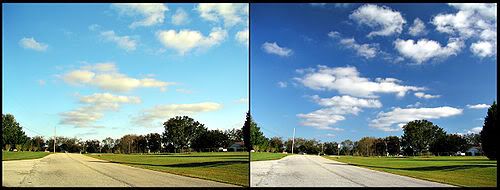
Yes, these days the effects of a Polarizer can be replicated in photoshop. But why spend the extra time to get a great shot on your computer, when you can get one right out of your camera. Most DSLR's will accept a polarizer, it simply screws onto the business end of your lens. Just know the diameter of your lens in mm (should be marked on the lens itself), and head to your local camera shop. They run in the range of $30-$50, but in my opinion, it's money well-spent for the time it saves in post processing.
The downside? You effectively lose a couple stops worth of light. Also, a polarizer can sometimes make your image a little flat by diminishing highlights too far in certain situations. So it takes a little practice to know when is the best time and place to use your polarizer. Just remember to carry a soft case in your bag, so you can stow your polarizer safely when not in use.
My advice? Spend the $30, practice until you know the best way to use your polarizer, and then enjoy all the time you'll save as well as more beautiful shots!
www.paulsearsphotography.com
Or check out more Paul Sears Photography pages on MySpace, Facebook, or Flickr
One of the best ways to get the most out of the sky is to use a Polarizing Filter. A Polarizing Filter, or Polarizer, is a filter used to control the contrast and lightness of the sky, reduce glare and atmospheric haze, and increase color saturation. Here's a great example from the Wikipedia article on filters - the image on the right uses a Polarizer, while the image on the left does not:
Yes, these days the effects of a Polarizer can be replicated in photoshop. But why spend the extra time to get a great shot on your computer, when you can get one right out of your camera. Most DSLR's will accept a polarizer, it simply screws onto the business end of your lens. Just know the diameter of your lens in mm (should be marked on the lens itself), and head to your local camera shop. They run in the range of $30-$50, but in my opinion, it's money well-spent for the time it saves in post processing.
The downside? You effectively lose a couple stops worth of light. Also, a polarizer can sometimes make your image a little flat by diminishing highlights too far in certain situations. So it takes a little practice to know when is the best time and place to use your polarizer. Just remember to carry a soft case in your bag, so you can stow your polarizer safely when not in use.
My advice? Spend the $30, practice until you know the best way to use your polarizer, and then enjoy all the time you'll save as well as more beautiful shots!
www.paulsearsphotography.com
Or check out more Paul Sears Photography pages on MySpace, Facebook, or Flickr
Subscribe to:
Posts (Atom)